Product Info
This BDM pod supports most HC12 and S12 chips, and is compatible with both 6-pin and 10-pin target BDM connectors. It requires no external power, as it receives power from your target board. It is compatible with 5V targets.
Features:
- low-cost BDM pod for all HC12 and S12 targets (not including S12X)
- works only with 5-Volt targets
- use Freescale D-Bug12 commands on target board
- supports hardware and software breakpoints in target
- USB interface to PC (or any platform with terminal emulation capability)
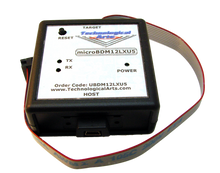
- 10-pin ribbon cable (superset of standard 6-pin BDM pinout), compatible with all Adapt12 and Adapt9S12 boards, as well as most other vendors' boards
- no power supply required-- draws power from target board
- housed in a robust plastic enclosure for maximum reliability
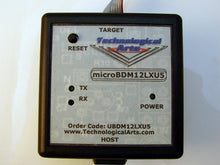
- includes power and activity indicator LEDs
- based on a 9S12DG128 MCU running D-Bug12 version 4.0
- supports baud rates up to 115K (default is 9600 baud)
- compatible with NoICE12 debugger
- supplied with miniB USB cable
- based on FTDI USB-to-UART chip (requires one-time installation of USB driver)
Chips supported:
68HC812A4, 68HC912B32, 68HC912BC32, 68HC912D60/A, 68HC912DA128/A, 68HC912DG128/A, 68HC912DT128/A, and all current 9S12 derivatives (supports only 5V operation). Can communicate with 9S12X chips, but does not support Flash erase/program nor the XGATE co-processor. Our USBDMLT pod is the recommended alternative for 9S12X chips.
Product Details
Here's how to use MicroBDM12LXU5:
Just connect the supplied ribbon cable to the target board's "BDM IN" connector. The target board could be any Adapt12-family board, or any other 'HC12 or 9S12 board that has a 6- or 10-pin BDM interface connector. Just be sure to line up the pin 1 indicator with pin 1 on the BDM connector. The host for the BDM Pod can be any type of computer running a terminal program. The BDM pod will receive its 5V operating power from the target board through the ribbon cable. A couple of suggested Windows terminal programs: TeraTermPro, MiniIDE, Hyperterminal. For details on using other terminal programs with D-Bug12, refer to the D-Bug12 Manual.
The big advantage of using a BDM pod is that it frees up all of the target board's memory for your application, while still offering you debugging capability. You can examine memory and registers, disassemble a memory range, set breakpoints, and do tracing in the target board's on-chip memory, among other things.
What's inside the box:
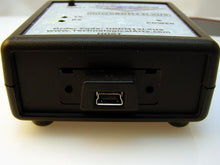
MicroBDM12LXU5 is a minimal 9S12 board, running D-Bug12 v4.0. It consists of the MCU, a crystal, a DB9 with integral USB interface circuit, and a few miscellaneous components, all mounted on a small board less than 2 inches square. A 10-pin ribbon cable is attached to one edge, a miniB USB connector is on the opposite edge, and the whole assembly is housed in a small plastic box. A miniB USB cable is included for the PC USB port interface.
Firmware Updates:
If D-Bug12 ever needs to be updated, it can be done using another BDM pod. By opening the box, applying a DC voltage (5 to 9V, nominal) to the power connector on the circuit board, and moving two jumpers to make the ribbon cable function as BDM IN, the board becomes a target, and Flash can be erased and re-programmed as needed.
Resources
Documentation and Application Notes


