
Configuring Windows USB Virtual COM Ports
Now connect a USB cable between a USB port on your PC and the USB interface module you are using. Windows should report a new device has been found and proceed to initialize it. To determine which virtual COMport it has been assigned to, right click the MyComputer icon on your Windows desktop, and select Properties from the popup menu. Next, click on the Hardware tab, and click on the Device Manager button.

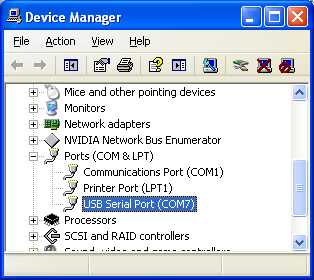

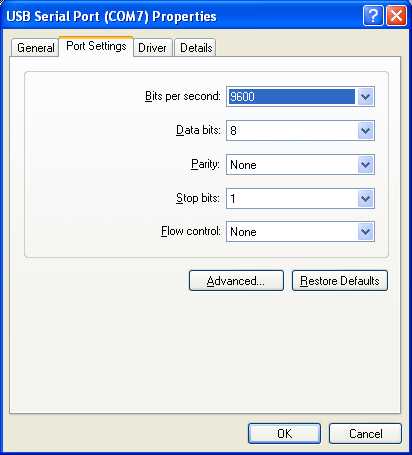

Click OK, and if Windows warns you about a duplicate, ignore the warning and click Yes. Click OK and then OK to the port settings. Then close the Device Manager window. If you want to confirm the port change has indeed been made, click on Device Manager again and check the listed Ports. Now close the System Properties window.
At this point, you are ready to use the virtual COM port in any application!
Note that, if you unplug the USB device and plug it back in later, Windows will still remember the COM port assignment, so you won't need to go through this procedure again. However, there is a known Windows issue that affects most applications. The virtual COM port will be removed from the device manager when the USB cable is unplugged, even if an application has the virtual COM port open. The virtual COM port will not be accessible even after the virtual serial device is reconnected unless the virtual COM port is released by the application prior to the reconnection, which may require closing the application first. It is therefore recommended that the application be closed before the USB device is unplugged.