NanoCore12 CodeWarrior Tutorial
Note: this tutorial assumes you have already downloaded and installed CodeWarrior on your computer. If not, please take a moment to do so now. The free Special Edition can be found here: http://www.freescale.com/webapp/sps/site/prod_summary.jsp?code=CW-HCS12X It is also assumed that you have read and understood the applicable NanoCore12 manual so that you know how to correctly apply power and achieve serial communications with it. If not, please visit the Documentation Library, here, for relevant documents: http://www.nanocore12.com/documentation.html
1. LOADING AND COMPILING A PROJECT

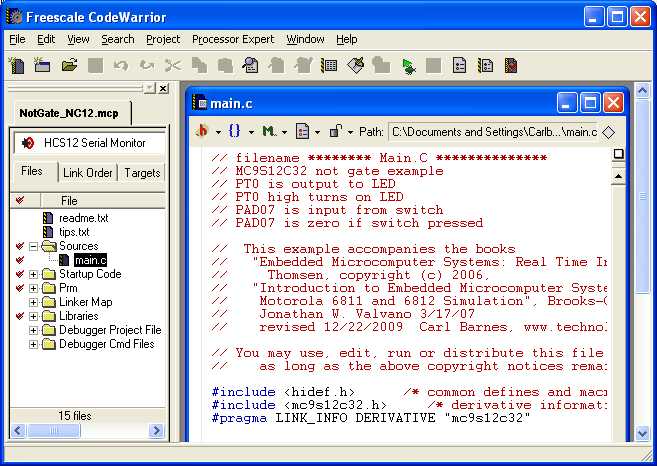
A file directory tree will be displayed in the left-hand side of the CodeWarrior IDE. Double-click on the file inside the Sources folder called main.c. The contents of the file will be displayed in the primary display area.

In preparation for loading the program into your NanoCore12 module, make sure the Load/Run switch is in the Load position, and then reset it (or apply power). This activates the on-chip Serial Monitor, which will coordinate loading of the program with CodeWarrior.
Now, select Project/Debug (or press F5) to Make the project (i.e. compile, assemble, and link the program, producing a file in the correct format for the serial monitor). This will launch the debugger and the serial monitor connection.
If CodeWarrior can't connect with the Serial Monitor, you will be prompted to select the Host Serial port.
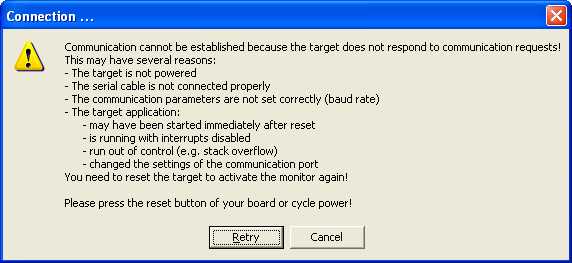
Or you may see the screen below, which means:
- that you forgot to set the Load/Run switch to Load and press the reset button, or
- the serial cable is not connected, or
- you don't have your module powered up

ANALYZING THE PROGRAM

All program comments are preceded with double-slashes (//). Comments are for the convenience of the reader, and are ignored by the compiler.
Next are some compiler directives, which are simply instructions to the compiler. For example, #include <hidef.h> tells the compiler to look for and include the header file which includes some standard definitions. The statement #include<mc9s12c32.h> is important because it includes a list of all the registers inside the 9S12C and their actual memory addresses. When writing a program, you can refer to the registers by name, instead of a numerical address, making the code more readable. These compiler directives are generated automatically by CodeWarrior when you use its Startup Wizard to create a project. We’ll do that in a later section.
Every C program has a main function, and there is no returned value. So, it starts with the familiar nomenclature
void main(void){
followed by one or more statements separated by the semi-colon (;), and terminated with a closing curly brace (}).
To use a digital i/o pin, you first need to define its direction (input or output) by way of its Data Direction Register. To use bit 0 of Port T (i.e. pin PT0 on NanoCore12) as an output, you need to set the corresponding bit to logic 1. In this example, we are only focusing on PT0, so we don’t want to influence the other pins in Port T. Thus, we use a mask to ensure we affect only the bit of interest (i.e. DDRT0). The statement
DDRT |= 0x01;
reads the current value of DDRT and logically ORs it with hexadecimal value 1, storing the result back into DDRT, thus defining PT0 as an output, and leaving the direction of the other pins of Port T untouched. Doing a simple equate would also work (i.e. DDRT = 0x01), but it would explicitly define the other bits of the port as well. This is not considered good programming practice since, in a more complex program, those direction bits may get defined in some other function(s).
Defining PAD07 as an input is done through the DDRAD register, by NANDing it with a mask containing 1 in the most significant bit position. With the Port AD pins, there is one more register that needs to be set up, since these port pins can be used as both analog and digital input. This register is called ATDIEN (Analog-to-Digital Digital Input Enable register). Here you enable the input driver so that reads of the PTAD register will reflect the digital value of the applied inputs. This needs a logic 1 in the most significant position (i.e. PTAD7), so that the pushbutton can be sensed. It takes awhile to become familiar with the register names, so studying some code examples and browsing mc9S12c32.h is recommended.
Now that the data directions for the two pins have been set up, it’s time to write the actual code to accomplish our mission (turning on the LED except when the button is pressed). An endless loop was implemented using a For statement:
For(;;){
Inside the endless loop there is a simple if/else test that produces the desired results. The port register PTAD reflects the applied logic levels present on the actual pins. We are only interested in PAD07, so we mask off the other bits to get the result for the comparison. The result is used to turn off or turn on the LED attached to PT0, which is directly controlled by the value we write to register PTT.
As you can see, doing simple digital input and output mainly involves masking off the bits of interest in the ports that are involved. So it would be wise to familiarize yourself with the logical operators and comparison operators of C.
